


By Simon Bray,27 Nov 2010
Photographing reflections can be extremely rewarding and produce stunning results, but sometimes achieving those dramatic shots can be harder than first thought. Today I’ll be highlighting a few quick tips for dealing with reflections, and helping you on your way to taking some breathtaking photographs!

Step 1. The Basics
Reflections come in many different forms and guises, varying from dramatic landscape shots to detailed macro compositions, but there are a few fundamental techniques which will help you achieve better results when dealing with reflections.
With regards to depth of field, try to select a high f-number such as f/11 or higher, this will help level out the subjects of the shot so the eye perceives them in closer relation, enhancing the reflection effect.
Focus depends a lot on the distance between the subject and the reflection. First, try focusing on the subject, then trying focusing on the reflection. This should produce slightly varied results and your preference will depend on how much attention you want to draw to the reflection.
Finally, think about the angle of the light and how it affect the reflection. In a studio setting you can manipulate this to emphasise the reflection, but in a natural setting you may want to explore different viewpoints to find the angle at which the reflection is most visible.
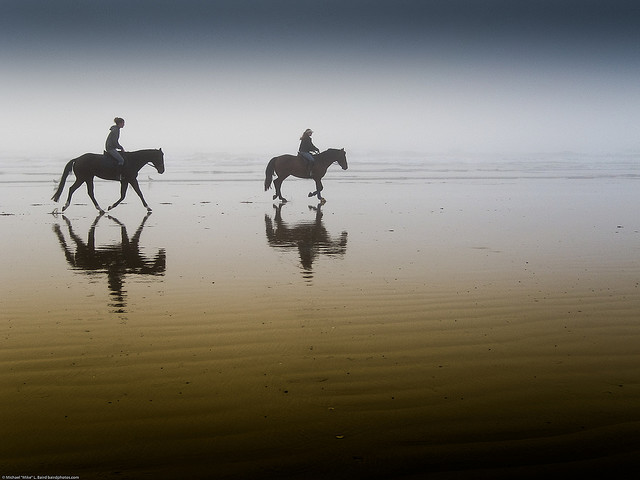
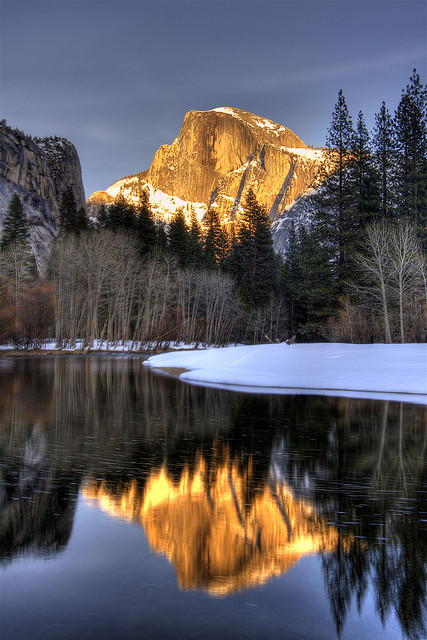
Step 2. Water & Landscapes
The grandeur, colors, and patterns offered by nature can be breathtaking and for me, the essence of this is displayed in a snowy-topped mountain reflecting upon a serene lake. The scene is a photographers dream, but how do you maximise its potential to capture a breathtaking shot?
Firstly, try and go when the light is at it’s best, either bright and early, or in the evening as the sun is setting. Be sure to take along your tripod to ensure a sharp shot and try using a couple of filters. A polarising filter will help you to control the amount of surface shine from the water, and a graduated neutral density filter will help ensure that the sky isn’t overexposed.
Try experimenting with slightly longer shutter speeds than normal to smooth out the water and, as I mentioned before, be sure to take into account the depth of field, angle of the light and try focusing in on the water for that extra level of drama.
Step 3. Shiny Things!
Photography involving reflections doesn’t have to be restricted to water-based landscape shots, there are plenty of other reflective surfaces to utilise that we encounter in everyday life such as mirrors, glass, metal, ceramic tiles and even varnished wood.
It’s important to remember that shiny surfaces such as these don’t absorb light, so if using artificial lighting, think carefully about the amount and angle of the light in relation to your surface. You may want to experiment with lighting from above or behind your subject.
This also applies to the use of flash, which will probably be limited as the light will often just bounce straight back at you.
Try to ensure that your surface is clear of scratches and fingerprints, especially when focusing in on detail within the reflection. Flat surfaces are easier to work with, as they will give more complete reflections.
Once you’ve found your surface, try using different subjects to see what reflections you can achieve. You can use anything you like, but the more interesting the shape, the more interesting the formation of the reflection will be.

Step 4. Experiment and Enjoy
Reflection photography is often described as abstract, which I think can be the case, but when utilising reflections, the type of shots that you create are totally up to you, the photographer.
You may want to utilise a reflective surface to make an otherwise predictable photo shoot more interesting, you may want to capture stunning real life landscapes, or you may want to experiment with angles and lighting to create eye catching abstract art shots. The joy is in the variety of potential shots, now it’s up to you to go and capture them!