

1 – Say good-bye to blurry shots and heavy noise.
Of course, when taking pictures of your drunk friends dancing half-naked in the street, there might not be enough time to setup the tripod. Don’t about you, though, but that’s not too high on my list of favorite subjects any way. Landscapes, on the other hand, allow for more preparation and are way worth taking the time to setup. Why use a tripod when you can hand-hold a camera? Perfection! By using a ground anchor, you are suddenly able to keep your ISO setting to a minimum and obtain the best quality image possible in terms of noise and sharpness. The usable speed range drops along with ISO and that’s why you need to be steady. But each lens has a sweet spot, an aperture at which it gives the cleanest results, and very often a tripod is the only way to achieve that setting if the light is anything but perfect. The whole spectrum of aperture / speed / ISO combinations becomes available, whether you are using a DSLR or a small point-and shoot.
2 – Play with motion blur.
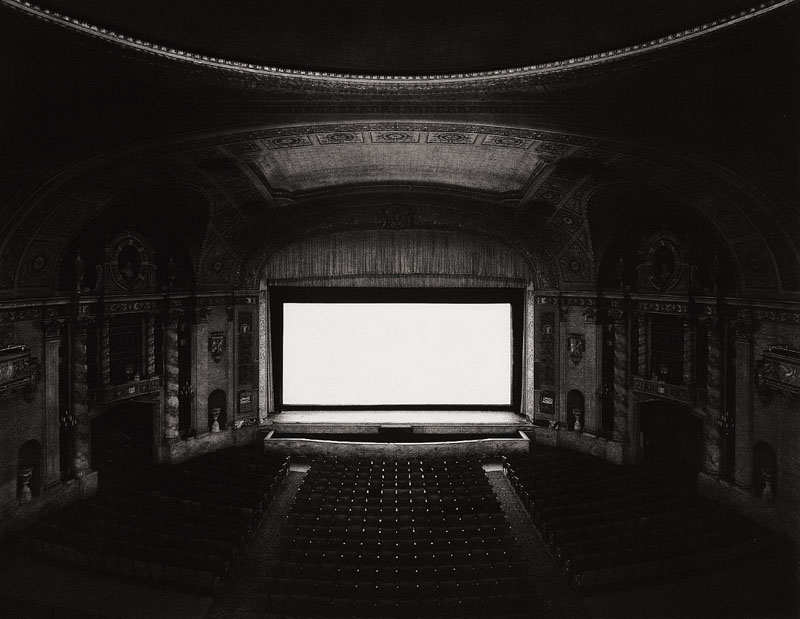
In step one, we got rid of accidental blur; it’s time to re-introduce it as a motion indicator. Photographs are not called “stills” for nothing; they can manage to shave a slice off of the fastest moving scene and freeze it into eternity. In come long exposures. When exposing longer (sometimes much longer) than a second, water turns fluids, nocturnal cars leave amazing light trails and people join a volatile crowd or simply disappear.
3 – Capture invisible light.
Our eyes are poor sensors and only weakly register a faint portion of the spectrum. A tripod allows for long exposures in near complete darkness, when our brain has decided that the session is over due to overwhelming obscurity, and yet when the shutter has been open for a few minutes, a new world emerges, bright and colorful and completely unsuspected.
4 – Test your affinity with HDR. The only way to bracket efficiently for HDR is to use a tripod and either over and underexpose a number of shots manually, or use the camera’s auto bracket feature. I recommend using mirror lock too if you go into very long exposures to avoid the vibration caused by shutter movement.
5 – Explore the mesmerizing world of macro photography.

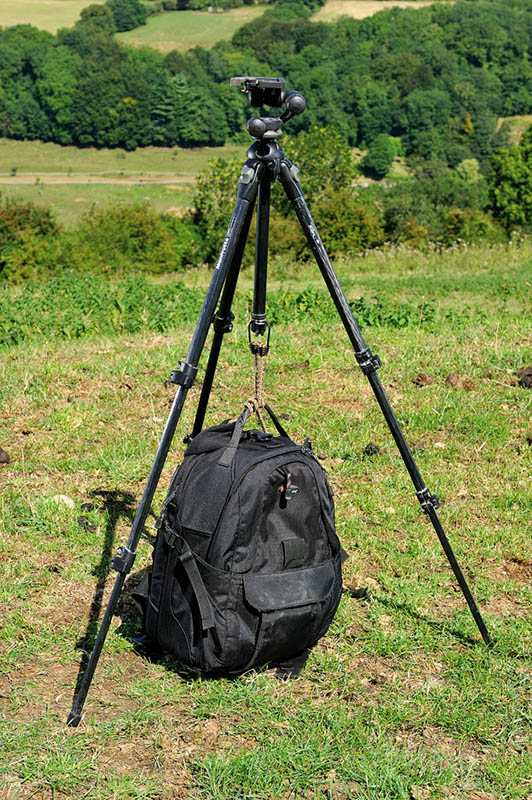
Only a tripod permits the patience and precision required by most macro situations, but a set of macro focusing rails is the only way to maximize tripod use and allow for easy framing and focusing. If the tripod is still too shaky, hanging a weigth from its base will steady it a little more.